Here's another look at my art process that combines traditional ink and water colour paint with digital finishing processes. I quite enjoy both aspects of creating art this way - it's nice to work with tangible materials and then touch-up and finish using the computer.
This was for OzComics Facebook Draw-Off challenge. The topic being DC / Vertigo Comics - Swamp Thing. I'm a fan of the character and have read many of the comic series over the last 20 years starting with the much praised Alan Moore, Steve Bissette and John Totleben run so I was already quite familiar with the character and had an idea in mind as to how I would create my illustration for the Draw-Off challenge. Having said that, a little research always helps, so I conducted a Google image search for inspiration, direction and reference. The following artists impressions of the character would inform my illustration.
 |
| Reference imagery |
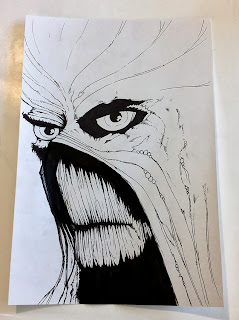 |
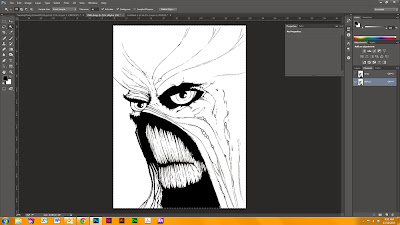
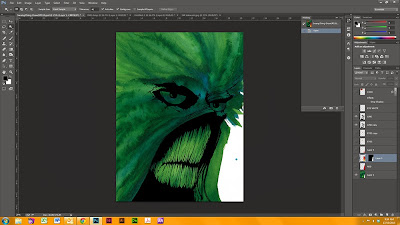
| The finished inked piece. |
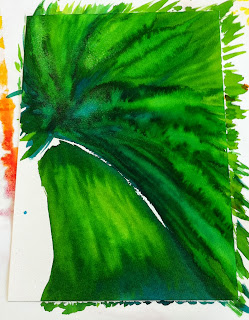 |
| The finished water colour inks. |
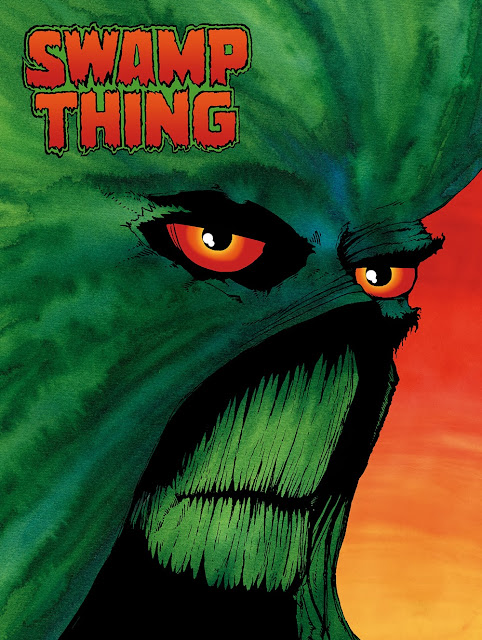 |
| The end result. Final art composited in Photoshop |
Here's a brief look at my digital colour process in 10 steps.
 |
| Step 1. Scan the artwork as a Black and White bitmap at 600dpi. This way you end up with a hi-res, very sharp, pure black and white image. |
 |
| Step 2. Convert image to Grayscale (you can down-size to 300dpi if you like to work on smaller files but leaving it at 450 - 600dpi tends to be industry standard). With the background layer selected (main artwork layer) > COPY ALL. Create a new ALPHA Channel (see palette window RHS column). |
 |
| Step 3. Paste the artwork into the ALPHA channel. It should look exactly like the black and white line art. |
 |
| Step 4. Create a new transparent LAYER and turn the background layer OFF so you can see the transparency grid. |
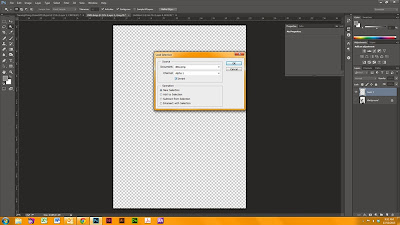 |
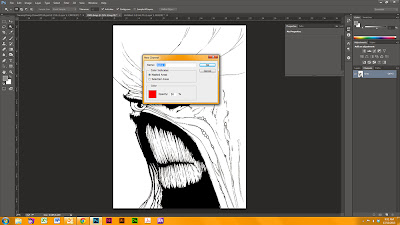
| Step 5. With the new layer selected, go to SELECT drop down menu, select LOAD SELECTION. Under the CHANNEL drop down menu select ALPHA and tick the INVERT check box. |
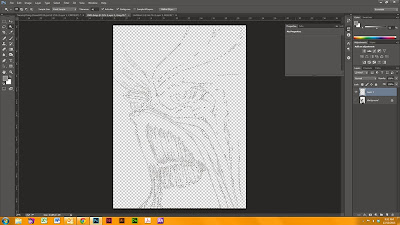 |
| Step 6. You should now see the 'marching ants' selection like the above. |
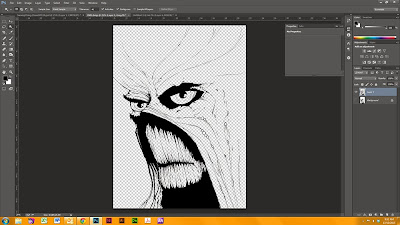 |
| Step 7. FILL this selection with the default (rich) black Photoshop colour swatch. You will now have solid black line art with a transparent background that you can add colour to underneath. |
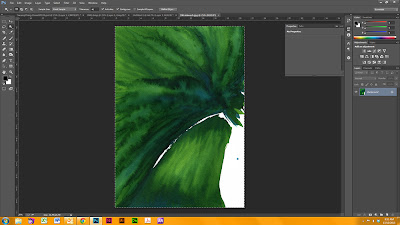 |
| Step 8. Scan the water colour ink wash into Photoshop as a hi-res JPEG (match the resolution to be the same as the scanned Black and White line art you are working on). SELECT ALL and COPY the colour art. |
 |
| Step 9. PASTE the colour art into a layer underneath the black line art. You'll notice at this stage I flipped the artwork horizontally as I wanted it to 'read' left-to-right. |
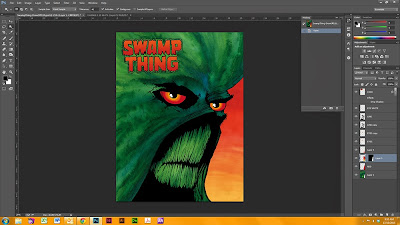 |
| Step 10. Clean up artwork, add detail, extra graphics and background as desired. |
I matched the background colour to Swamp Thing's eyes as this keeps the colour palette simple and helps the foreground image stand out. I find the best way to work is by using individual layers for each artifact. In the example above, the eyes, logo, line art and background colour all have separate layers - I rename my layers to be what they are as this makes identification much easier when working on PSDs that have
lots of layers. Editing, tweaking and experimenting is a breeze with multiple layers and much faster too.
The red sky was recycled from another illustration - I find that it's good to have a library of textures and ink washes to use in my illustration work as that speeds up the process and gives the finished art a more organic feel. As a side note, the above illustration from start to finish took about 4 hours to complete.


No comments:
Post a Comment